Introduction
Social Login Script for Facebook, Google, LinkedIn
It is often required that, a user register’s or sign up to login to a particular website or application. It is a tedious job to fill those long forms with user basic details. To avoid filling long forms, Cuppa Angular 2 OAuth provides a module to login using social OAuth services like google OAtuh, Facebook OAuth and LinkedIn OAuth. Using this your application will be able to recieve basic details of the user from social networking sites and you can store in your application environment.
Getting Started
Installation
Cuppa Angular social login script is available as an npm package ng2-social-login
npm install ng2-social-login
Initialization
- Import
CuppaOAuthModulein your app root module.import { CuppaOAuthModule } from './cuppaOAuth/cuppaOAuth.module'; @NgModule({ imports: [ BrowserModule, HttpModule, CuppaOAuthModule // this is the cuppa oauth module ], declarations: [ ], providers: [], bootstrap: [ AppComponent ] }) export class AppModule { } - Secure your app routes by applying the
AuthServiceon your routescanActivateproperty.ImportAuthServicein app router module before setting thecanActivateproperty withAuthService
import { AuthService }          from './cuppaOAuth/auth.service';
const appRoutes: Routes = [
  {
    path: '',
    component: LoginComponent },
  {
    path: 'login',
    component: LoginComponent },
  {
    path: 'admin',
    component: AdminComponent,
    canActivate: [AuthService],
    children: [
      {
        path: '',
        canActivateChild: [AuthService],
        children: [
          {
            path: '',
            component: AdminDashboardComponent
          }
        ]
      }
    ]
  },
  {
    path:'projects',
    component: ProjectsComponent,
    canActivate:[AuthService]
  }
];

@NgModule({
  imports: [
    RouterModule.forRoot(appRoutes)
  ],
  exports: [
    RouterModule
  ],
  providers: [
    PreloadSelectedModules
  ]
})
export class AppRoutingModule {}
- Now, it’s time we place the cuppa auth view, containing the login buttons. For example you have your login component where you want the
cupp oauthto show the login options, place thecuppa-oauthtag there with config options as below
<cuppa-oauth [authConfig]="config"></cuppa-oauth>
- You login component class should have the config object as below:
import { Component }        from '@angular/core';

@Component({
  template: `
    <div class="row">
      <cuppa-oauth [authConfig]="config"></cuppa-oauth>
    </div>`
})
export class LoginComponent {
   private authServerBaseUrl = 'https://cuppa-angular2-oauth.herokuapp.com';
   private config = {
   "loginRoute":"login",
   "linkedin":{
     "authEndpoint": this.authServerBaseUrl+"/auth/linkedin",
     "clientId":"8176r44lz2ewos",
     "redirectURI" : "https://cuppa-angular2-oauth.herokuapp.com/admin"
   },
   "facebook":{
     "authEndpoint": this.authServerBaseUrl+"/auth/facebook",
     "clientId":"929055083862567",
     "redirectURI" : "https://cuppa-angular2-oauth.herokuapp.com/admin"
   },
   "google":{
     "authEndpoint": this.authServerBaseUrl+"/auth/google",
     "clientId":"77954512562-eftl8up04q1g3aha2mjg5h6bgel9svkk.apps.googleusercontent.com",
     "redirectURI" : "https://cuppa-angular2-oauth.herokuapp.com/admin"
   }
 };
}
Once you have done this, you should see the login page with cuppa oauth login features.
Config Options
| Property | Type | Description |
|---|---|---|
| loginRoute | String | The route to redirect when not logged in |
| authEndpoint | String | Endpoint to make a call to login the user. This is Oauth Server which generates the token for the logged in user. By default it points to https://cuppa-angular2-oauth.herokuapp.com. To setup server in your environment follow steps in below section. |
| clientId | String | The client id of your application. You will get this once you create you application with any of the provider viz., Google, Facebook, LinkedIn |
| redirectUI | String | The route to redirect the user after successful login. Not: This should match exactly with the redirect URL specified at the time of application creation with the respective providers viz., Google, Facebook and LinkedIn. |
API Methods
logout()- To logout the user from current session.- Example:
      import { Component } from '@angular/core';
      import { AuthService }      from '../cuppaOAuth/auth.service';

      @Component({
      template:  `
      <h1>Projects Page</h1>
      <button (click)="logout()">logout</button>
      `
      })
      export class ProjectsComponent {
      constructor(private authService: AuthService ){

      }
      public logout(){
          this.authService.logout();
      }
      }
Auth Server Setup.
- To run the auth server in your environment instead of
https://cuppa-angular2-oauth.herokuapp.comfollow the below steps. - Download
auth-server.jsfrom the github repository. - Open command line and change location to the file directory.
- Run
node auth-server - Server would start on http://
:5000 - Replace
authServerBaseUrlwithhttp://<yourhost>:5000in your angular login component class config object.
Auth Server Config
- The auth server needs a set of configuration options as below. All the options are self explanatory in themselves. Refer to Documentation to learn how to create facebook, google, linkedin apps.
module.exports = {
MONGO_URI: process.env.MONGO_URI || 'mongodb://<username>:<password>@<mongodb host url>:<port>/<DB Name>',
TOKEN_SECRET: process.env.TOKEN_SECRET || 'YOUR_UNIQUE_JWT_TOKEN_SECRET',

FACEBOOK_SECRET: process.env.FACEBOOK_SECRET || 'YOUR_FB_APP_SECRET',
GOOGLE_SECRET: process.env.GOOGLE_SECRET || 'YOUR_GOOGLE_APP_SECRET',
LINKEDIN_SECRET: process.env.LINKEDIN_SECRET || 'YOUR_LINKEDIN_APP_SECRET',
};
Mongo DB Schema
var userSchema = new mongoose.Schema({
  email: { type: String, lowercase: true },
  password: { type: String, select: false },
  displayName: String,
  picture: String,
  provider: String,
  provider_id: String
});
Locally Build and Run
1) Clone git repository.
2) Configure auth-config.js with your mongoDB environment details and app secrets.
3) replace authServerBaseUrl in login component with your environment details.
4) Run npm start
5) Go to http://localhost:5000
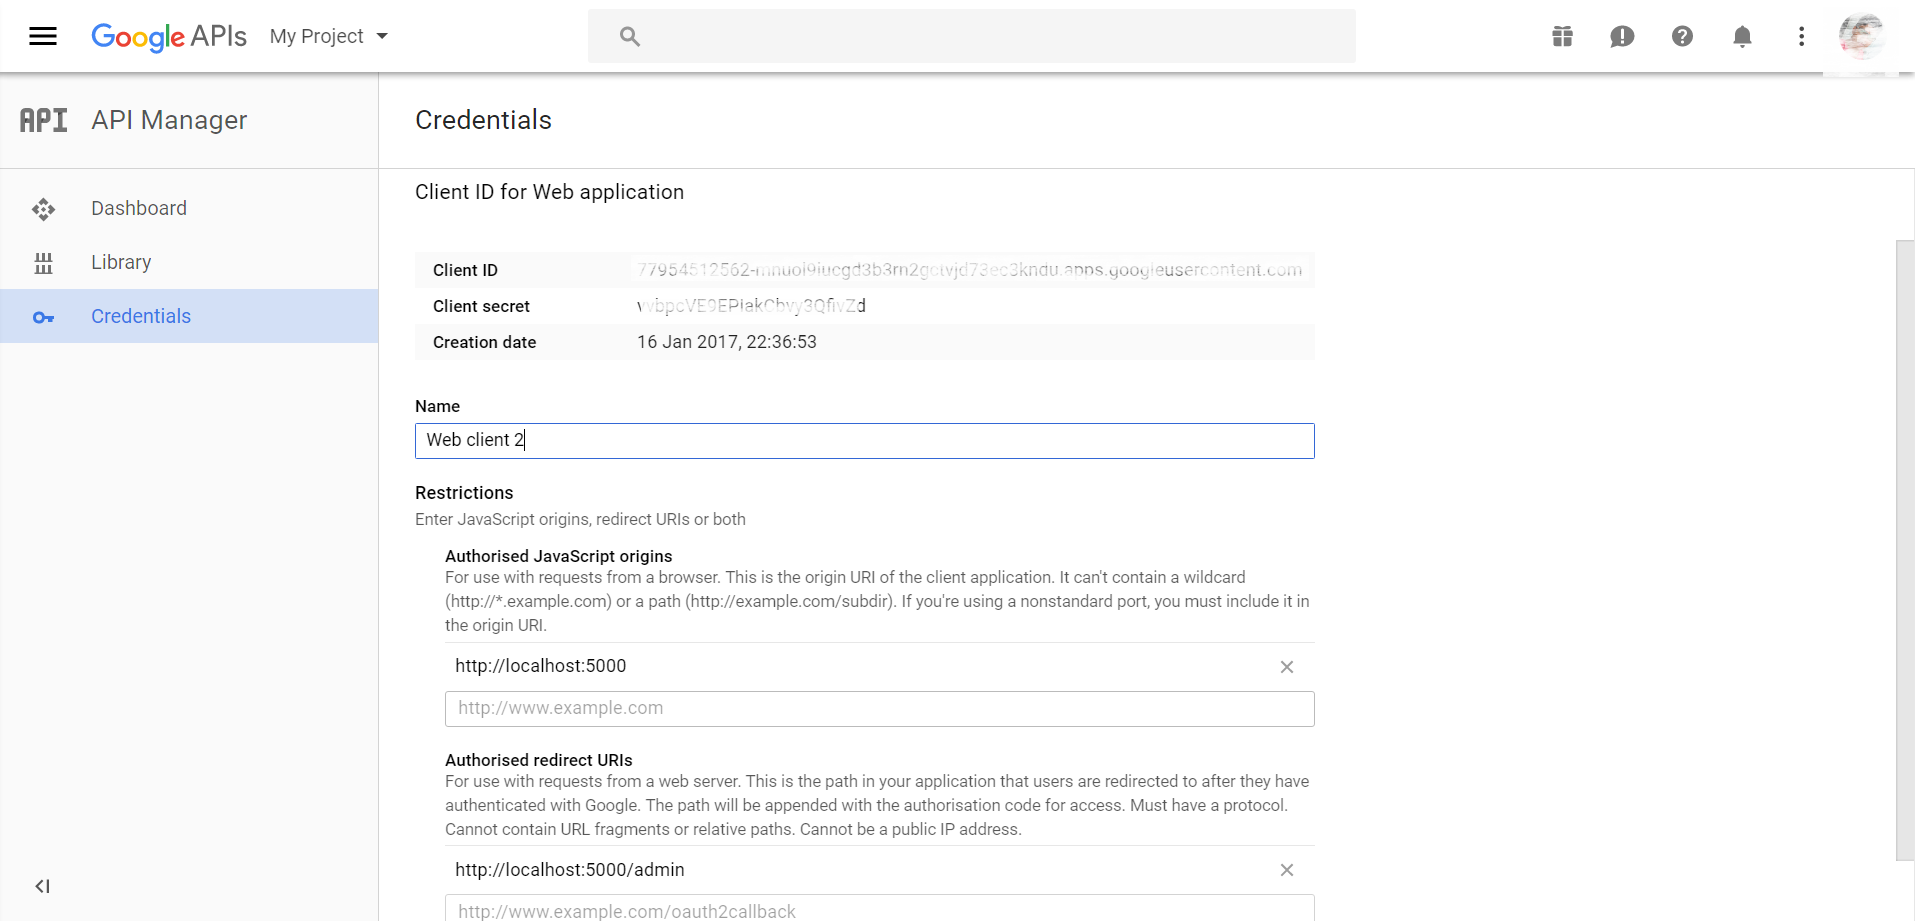
Create Google Application
1) Visit Google API Console
2) Go to "Credentials" tab.
3) Select "OAuth Client ID"" from "Create credentials"" tab.
4) Select "web application"" option.
5) Provide your application name, URL of your app origin and redirect URL and Click Create.
6) On creating successfully, you will see the following screen with client ID and client secret.
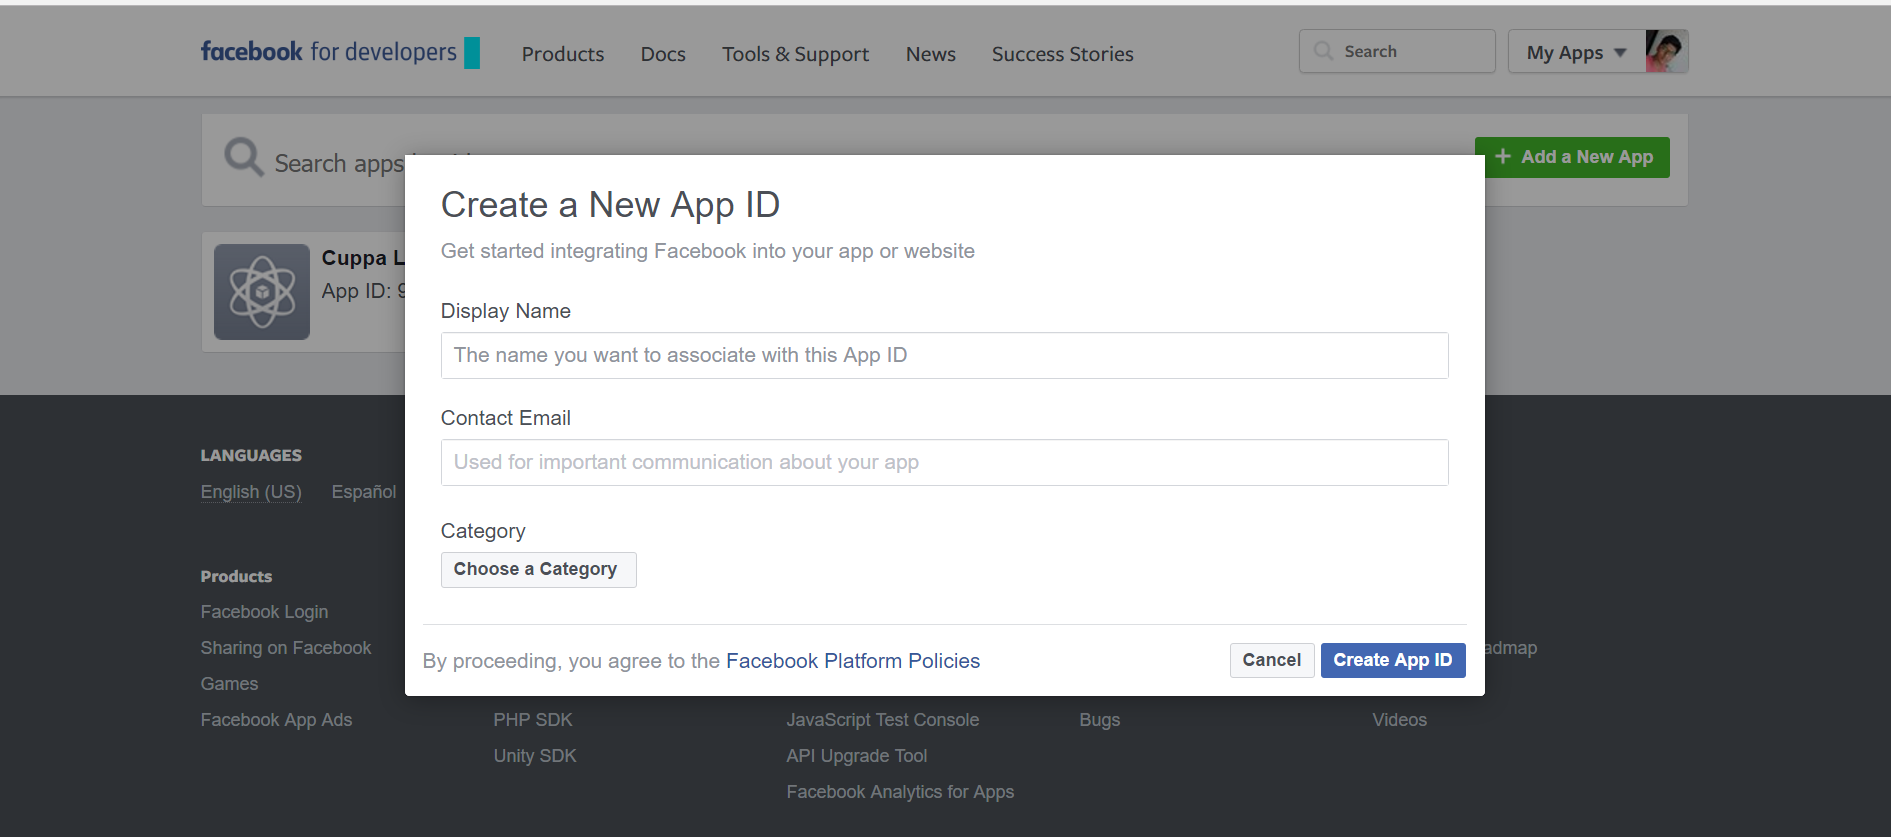
Create Facebook Application
1) Visit Facebook Apps
2) Click "Add a New App" button.Fill the details and click "Create ID"
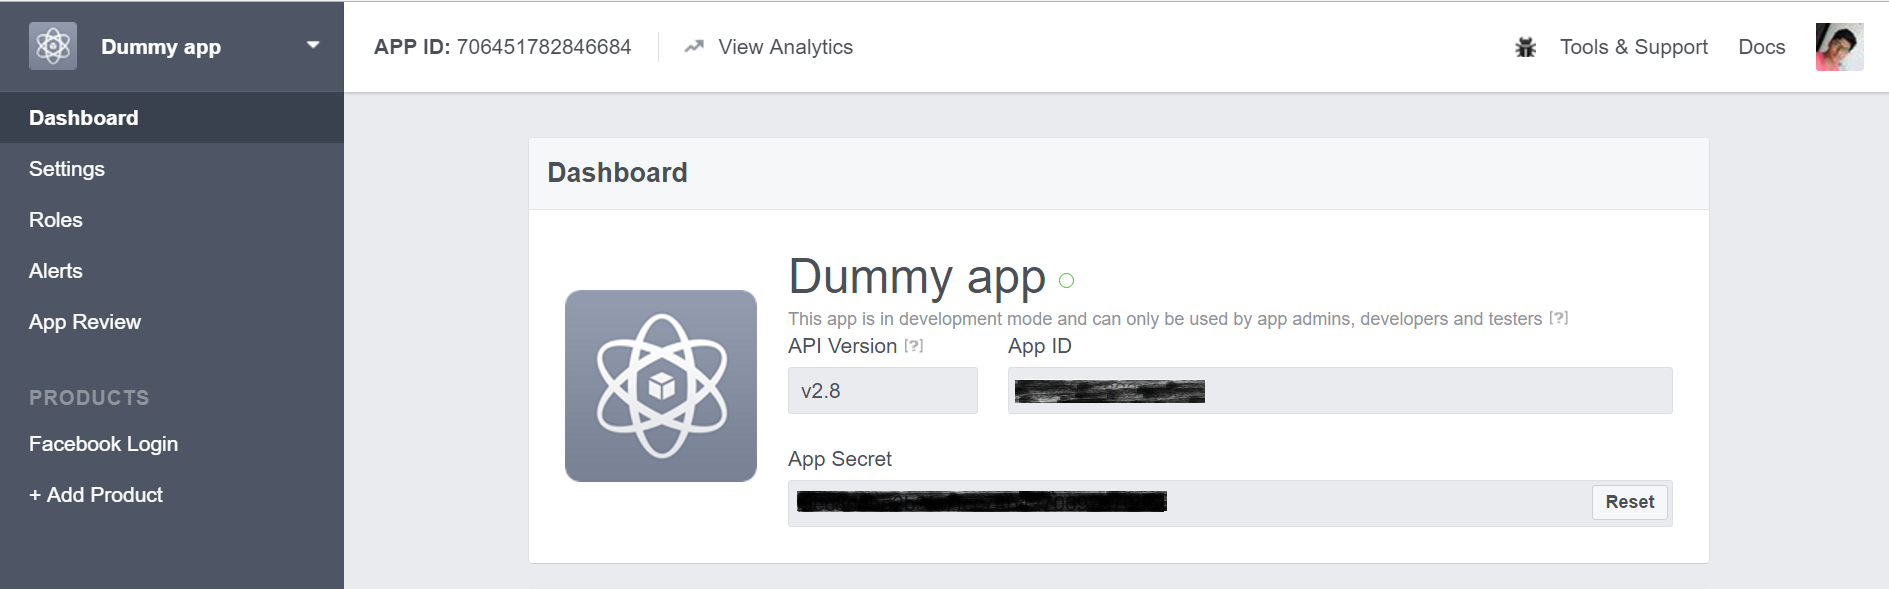
3) Select "Facebook Login" from product list and click "Get Started"
4) Provide redirect URL.</br></br>
6) On creating successfully, you will see the following screen with client ID and client secret.
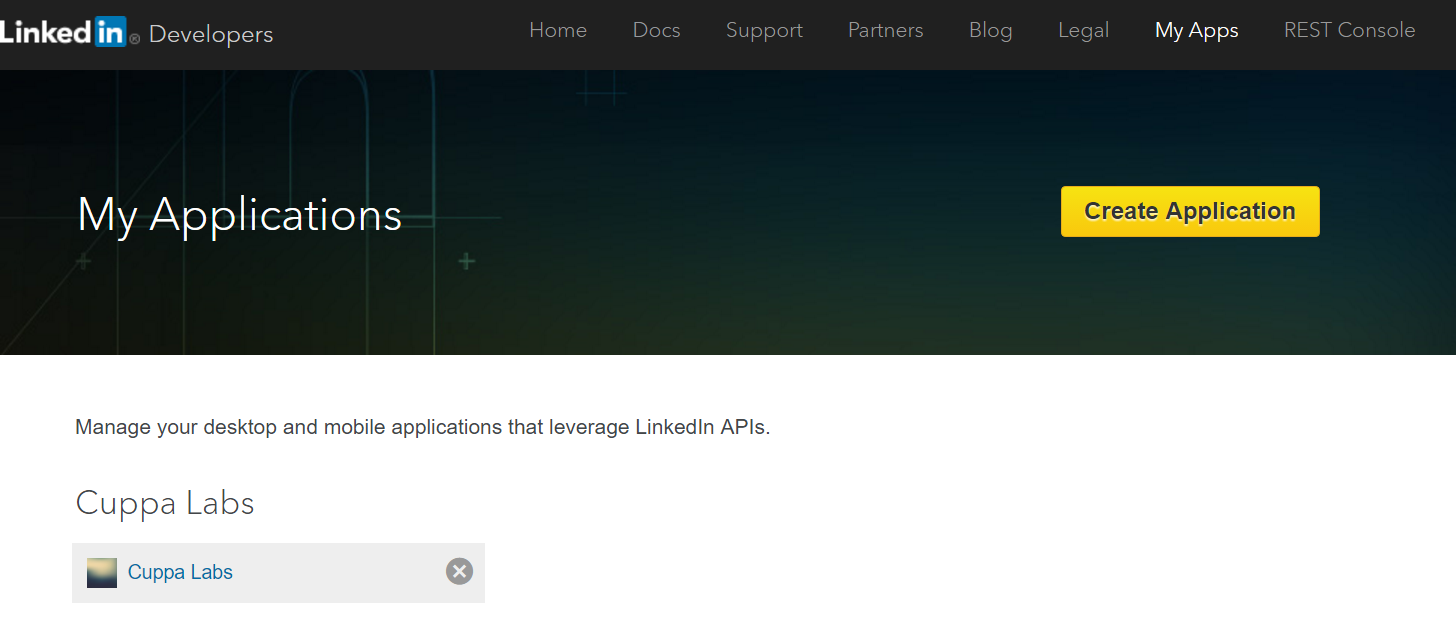
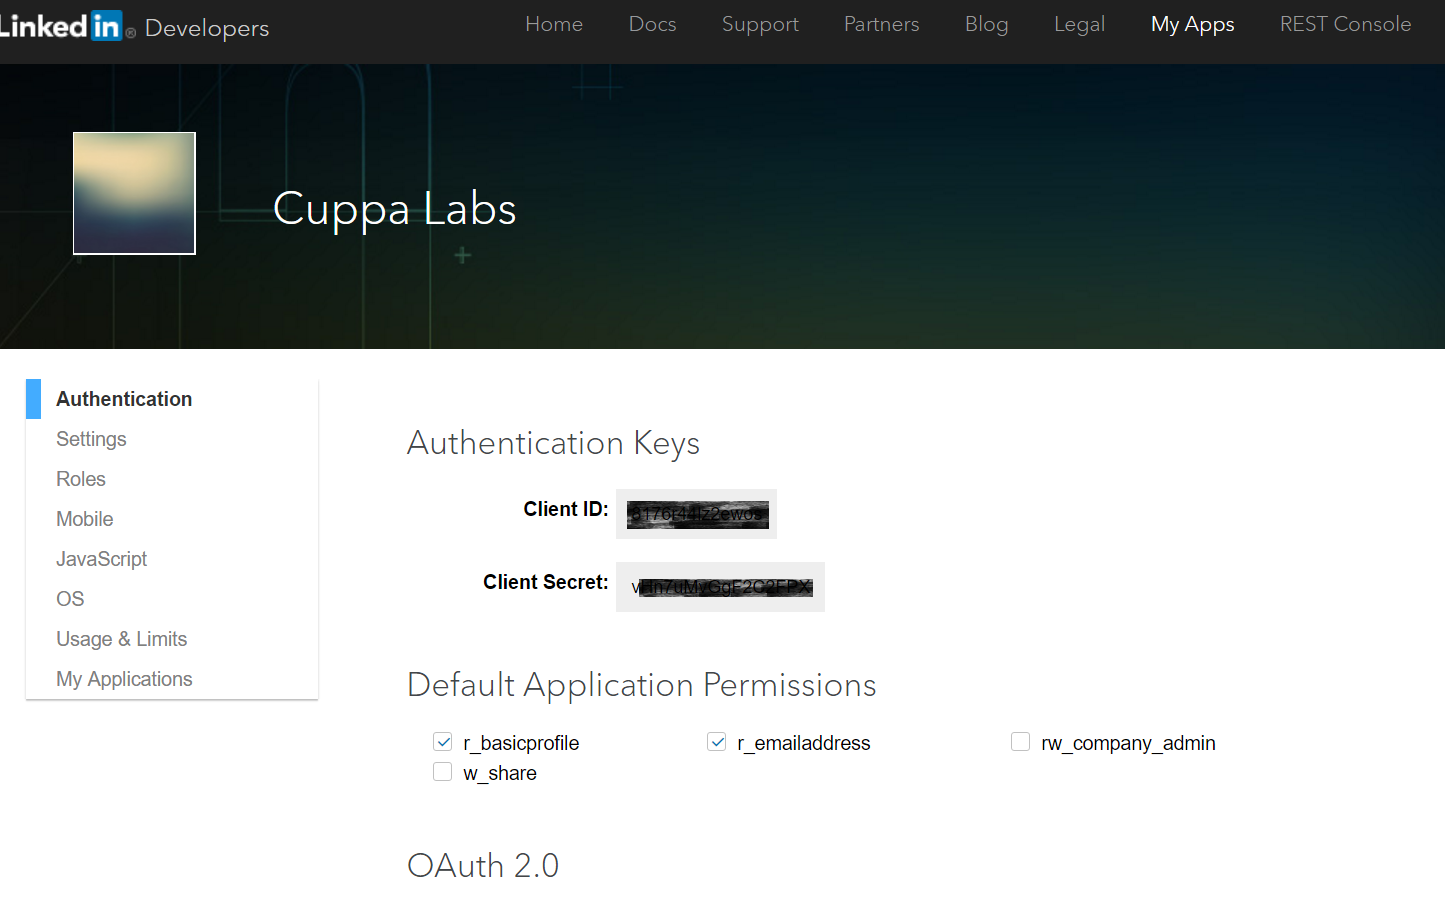
Create LinkedIn Application
1) Visit LinkedIn Apps
2) Click "Create Application" button.Fill the details and click "Create"
6) On creating successfully, you will see the following screen with client ID and client secret.
Ahh !!! Now you are ready to make your app up and running.
Licence
This project is licensed under the MIT license. See the LICENSE file for more info.
Credits
Thanks to Font Awesome the library.
Author
Pradeep Kumar Terli
Web UI Developer, Blogger, Thinker , Entrepreneur. Loves to explore technology with focus on web technologies.